STM32 microcontroller family is based on ARM Cortex M 32-bit processors. They offer a range of high performance, low power, and low cost MCUs.
Product lines include:
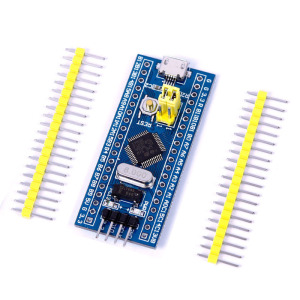
72MHz ARM Cortex M3 CPU, 20kB RAM, 64kB Flash MCU
3.3V (On board LDO for 5V supply)
HW USB support (2.0 Full Speed, Device)
UART or SWD programming (USB possible via specific Bootloader)
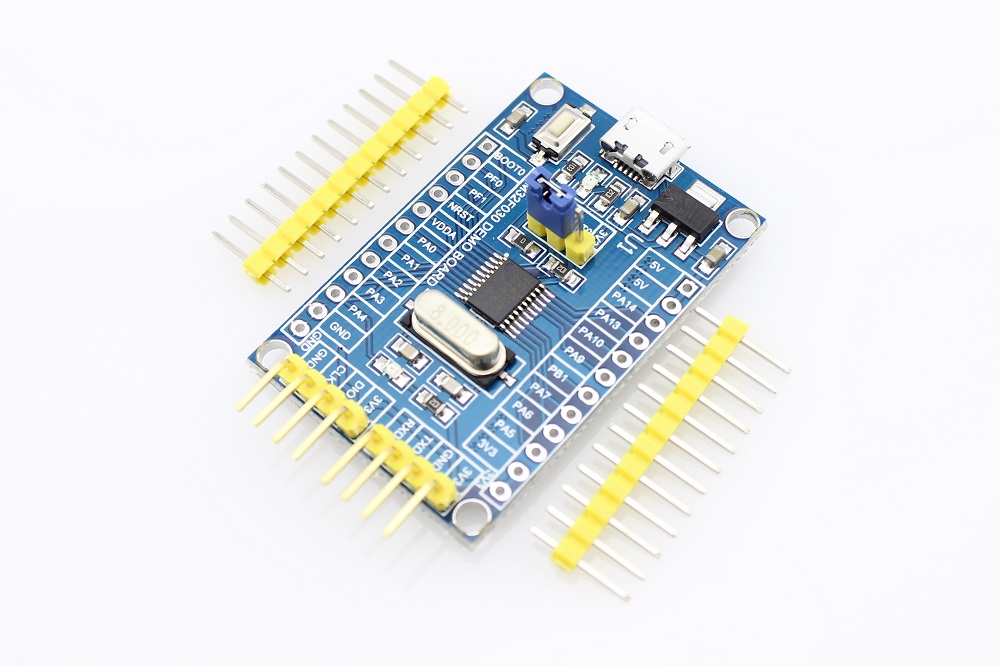
48MHz ARM Cortex M0 CPU, 4kB RAM, 16kB Flash MCU
3.3V (On board LDO for 5V supply)
UART or SWD programming
This tutorial relies on simple command line setup. It uses:
An alternative, especially for STM32F103 based boards, is to use Arduino IDE. Refer to this tutorial.
ARM GCC toolchain is installed from distribution:
# Toolchain
sudo apt-get install gcc-arm-none-eabi
# ST FW requires newlib
sudo apt-get install libnewlib-arm-none-eabi
Download and install STM32CubeMX
# Run STM32CubeMx
~/local/STM32CubeMX/STM32CubeMX &
In STM32CubeMx:
> New Project
> MCU Selector : STM32F103C8Tx (or STM32F030F4Px)
> Pinout > Select PC13 (or PA4) set as GPIO_Output
         > Select USART1 > Mode set as Asynchronous
> Clock Configuration > select HSE

> Project > select Generate code
          > Toolchain / IDE > set as Makefile
          > Code Generator > select Copy only the necessary library files
          > select OK
In the generated main.c, add:
while (1) {
  HAL_GPIO_TogglePin(GPIOC, GPIO_PIN_13); // for STM32F030F4Px: (GPIOA, GPIO_PIN_4)
  HAL_Delay(500);
}
In the generated Makefile, add:
BINPATH=/usr/bin
make
STM32 MCUs have on chip booloader that support Flash programing via USART.
Select Flash utility based on OS:
To enable serial bootloader, BOOT0 pin must be set high and reset applied.
# Install Linux STM32 flash tool:
sudo apt-get install stm32flash
# Flash :
stm32flash -v -w build/stm32f.hex /dev/ttyUSB0
stm32flash 0.5

http://stm32flash.sourceforge.net/

Using Parser : Intel HEX
Interface serial_posix: 57600 8E1
Version      : 0x31
Option 1     : 0x00
Option 2     : 0x00
Device ID    : 0x0444 (STM32F03xx4/6)
- RAM        : 4KiB  (2048b reserved by bootloader)
- Flash      : 32KiB (size first sector: 4x1024)
- Option RAM : 16b
- System RAM : 3KiB
Write to memory
Erasing memory
Wrote and verified address 0x08001e00 (100.00%) Done.
This tool can be used to flash USB bootloader for STM32F103:
# Download stm32duino USB DFU bootlader binary:
wget https://github.com/rogerclarkmelbourne/STM32duino-bootloader/blob/master/STM32F1/binaries/generic_boot20_pc13.bin
# Un-protect the flash:
./stm32flash -k /dev/ttyUSB0
./stm32flash -u /dev/ttyUSB0
# flash a binary image:
./stm32flash -w generic_boot20_pc13.bin -v -g 0x0 /dev/ttyUSB0
PWM tutorial or, Minimal setup
stty 115200 cs8 -F /dev/ttyUSB0
cat /dev/ttyUSB0
hd -x < /dev/ttyUSB0
echo "8" > /dev/ttyUSB0
while sleep 0.4; do for i in 1 2 3 4 5 6 7 8 8 0; do echo -n $i > /dev/ttyUSB1; sleep 0.04; done; done
sudo apt-get install dfu-util
dfu-util -l
dfu-util -a 2 -D stm32f103.bin
Note: For board with Stm32duino bootloader, program needs to be compiled at start address 0x8002000 (1st 8k flash are used by bootloader).
STM32F103 can use Black Magic Probe FW and be used as HW debugger. Here
Alternatively, Raspberry Pi can be used: Tutorial
05-Oct-2018